
When you run a program or use your web browser, this one creates temporary files in the “C:\Users\[Username]\AppData\Local\Temp” location.
But not all programs are good at cleaning those temporary files when they are no longer needed or when the program is terminated.
So, over time you’ll end up with a substantial temporary folder with many junk files occupying precious disk space.
The loss of disk space is not the only issue; you can leave it if you have a disk with ample storage space. But when it harms your system performance and leads to a slow boot, this can be so annoying!
I’ve seen many people complying about their computers suffering from a slow boot, despite their high-end hardware configuration.
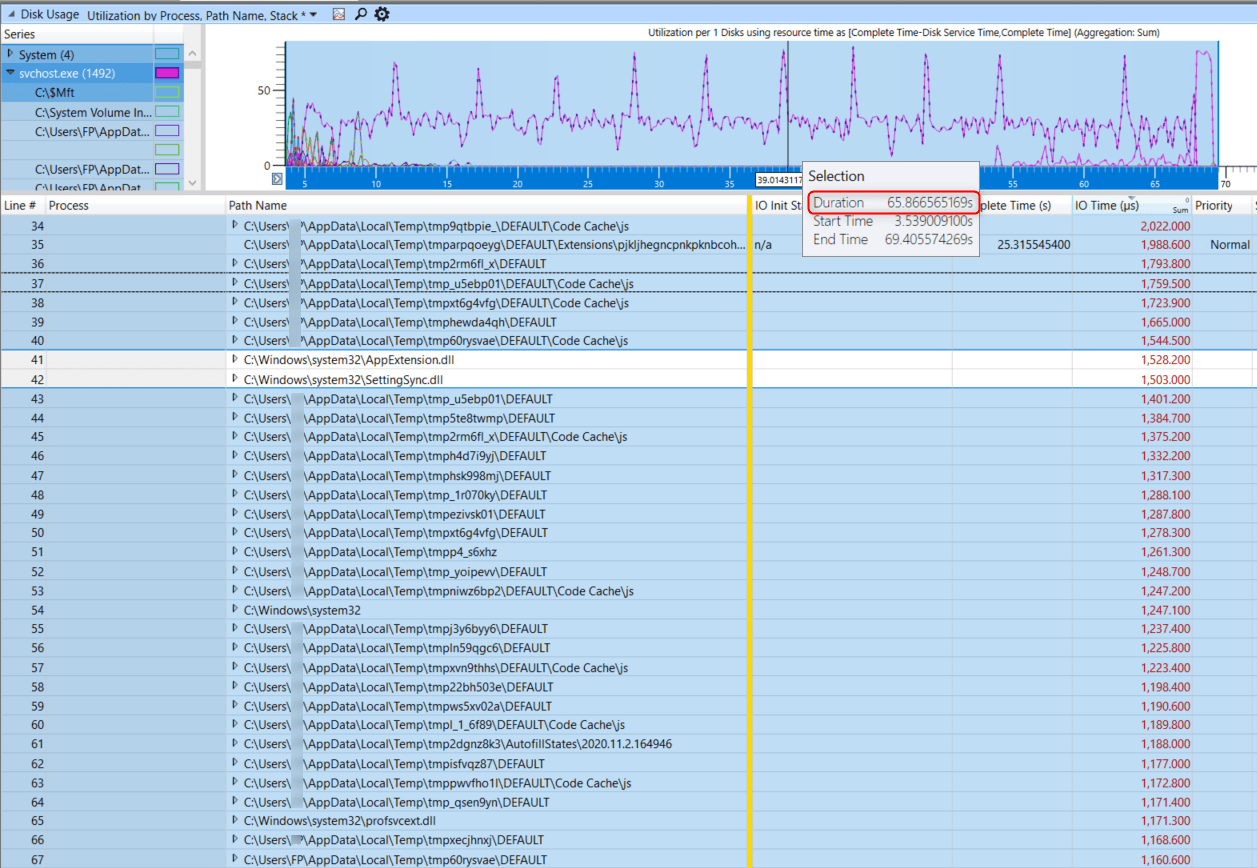
When I analyze their boot trace with Windows Performance Analyzer, I find that windows 10/11 is taking too long to load the user profile because of the substantial size of the “C:\Users\[Username]\AppData\Local\Temp” folder!
When they empty this folder, their system boots up in a few seconds!

How To Avoid This Situation?
Check your temporary file’s size frequently, and delete the junk files.
- Type the following command to display the path to your temporary folder: “echo %TEMP%“

- Go to this location, and delete all the content;
NB: You may get a delete error stating that another application uses the file; ignore the message and continue the operation.
- You can also use the “TreeSize” free utility to display the disk space occupation. It offers an easy way to identify large folders and delete their content.

Automate The Process
The problem with manual maintenance tasks is that you have to remember to do them. I prefer to schedule an automated task to run periodically and forget about it.
You can automate this folder cleaning task using windows storage sense;
- Open Windows 10 settings;
- Type in the search area “storage settings” and click on the best match;


- First, toggle the button to enable “Storage Sense”;
- Second, click on “Configure Storage Sense or run it now”;

- Under the “Run Storage Sense” list, select how do you want to schedule the storage sense;

- The option “During low free disk space” is selected by default; change it to “Every month”
- Next, under the “Temporary Files” section, check “Delete temporary files that my apps aren’t using”.
- If you don’t want Storage Sense to empty your recycle bin periodically, then choose “Never” in the list.
Now relax and let the “Storage Sense” take care of your disk space.
Read this article to learn more about how to free up disk space in your computer.